In this article, we will review step by step how to set up Integration Manager to import journal entries into Microsoft Dynamics GP using a .csv file.
Setting up Integration Manager to import journal entries using a .csv file
1. Create a new integration:

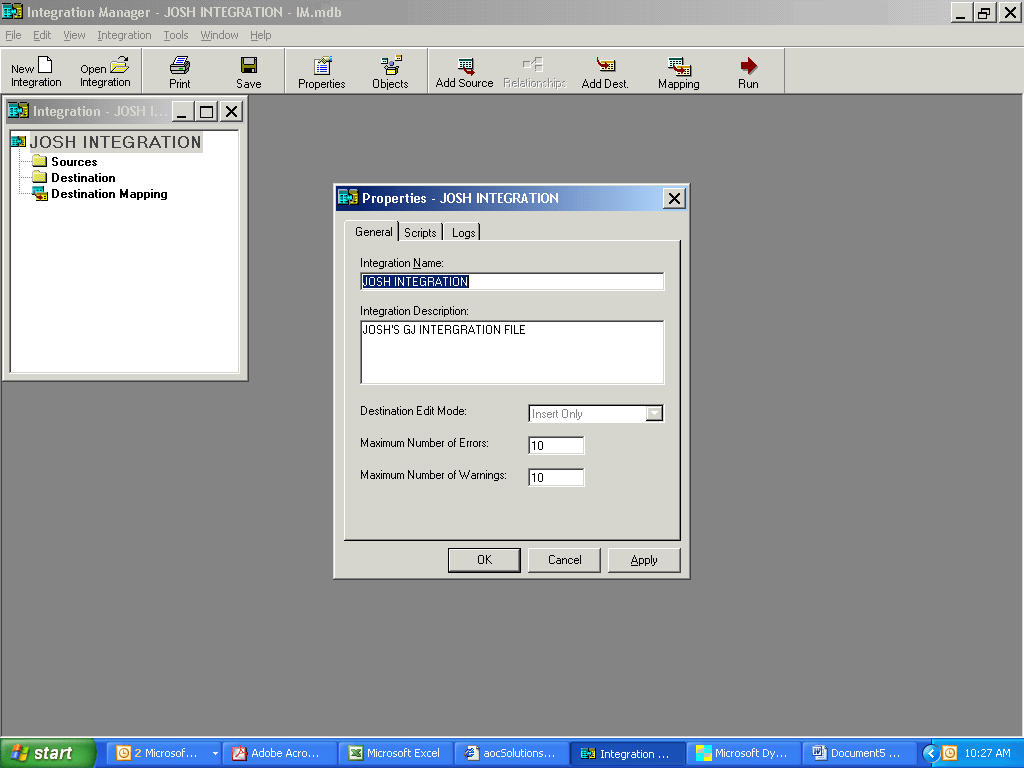
2. Name the integration and provide a brief description:
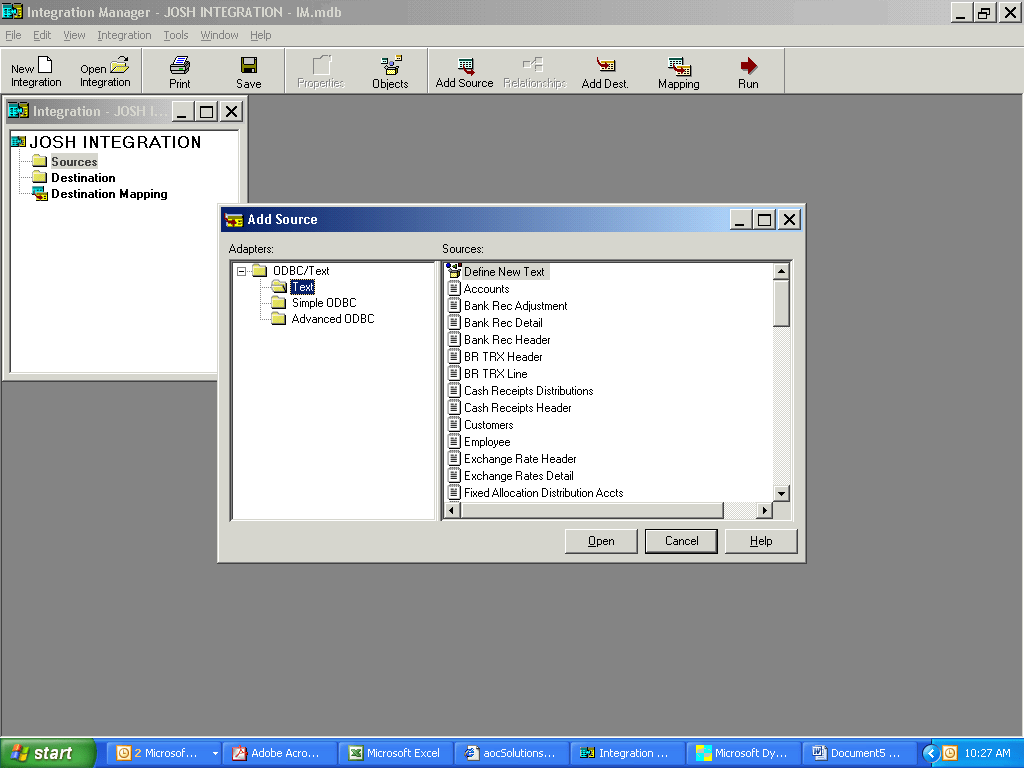
3. Select Add Source and expand ODBC/Text. Choose Text > Define New Text:
4. While in the General tab, name Header file (Josh Header) and point to .csv file. The delimiter is comma and you’ll need to mark First Row Contains Column Names: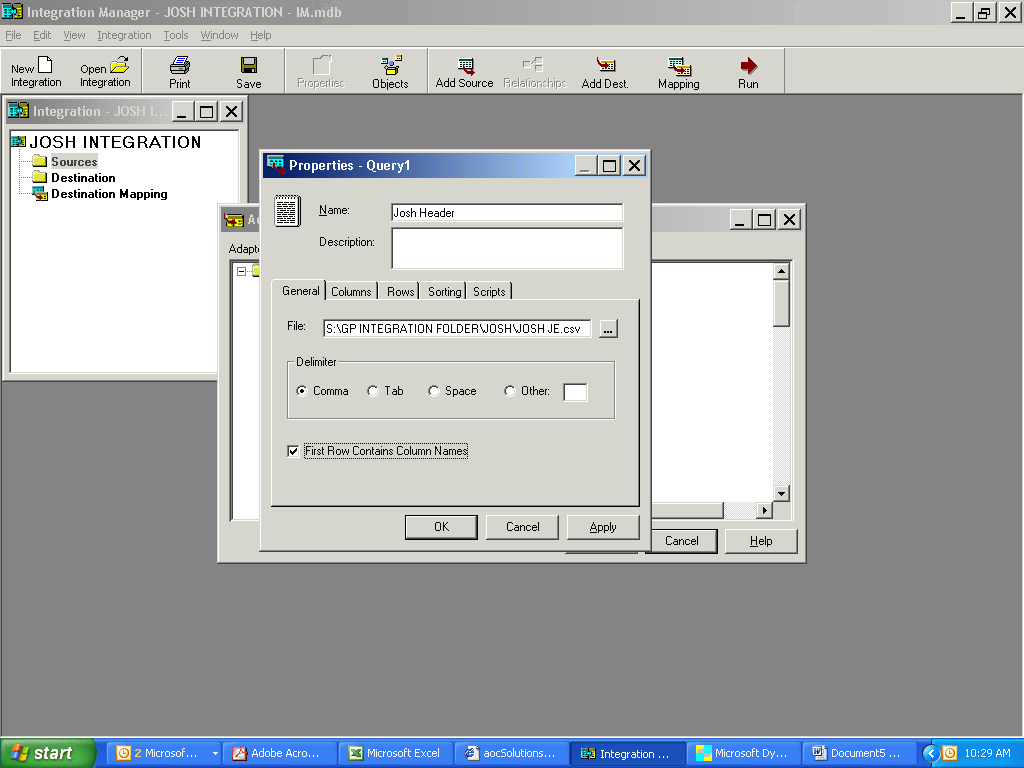
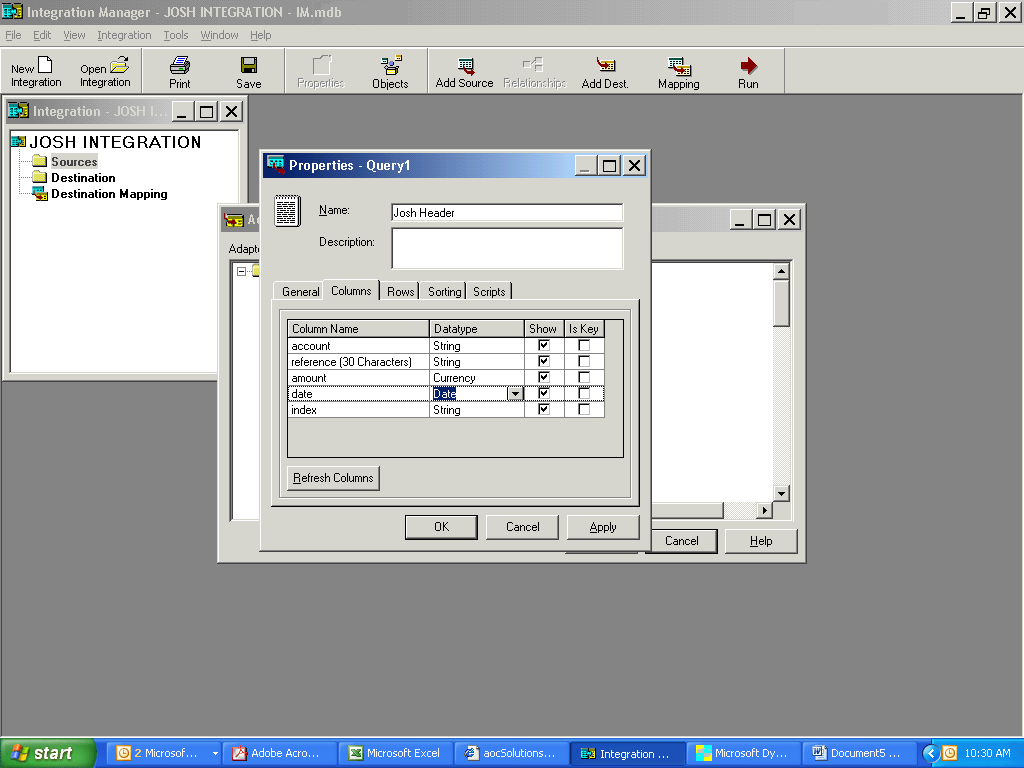
5. Change to Columns tab and change datatype on amount, date:
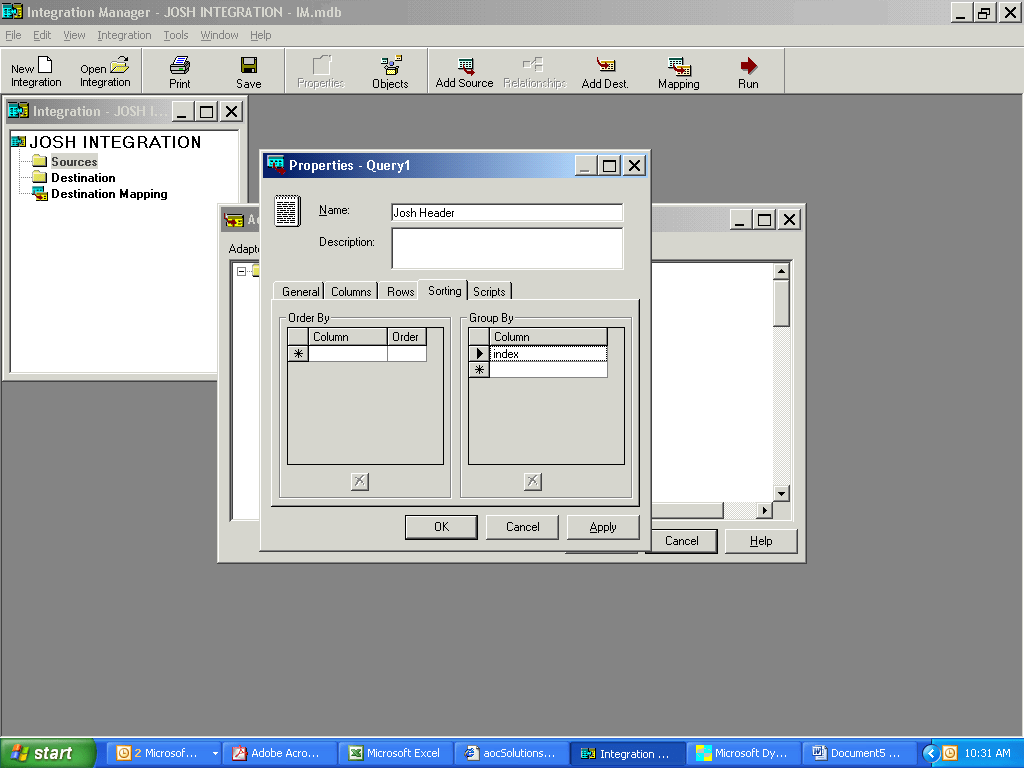
6. Change to Sorting tab and insert index into the Group by column:
7. Add a second Source file by selecting Add Source > ODBC/Text > Text >Define New Text
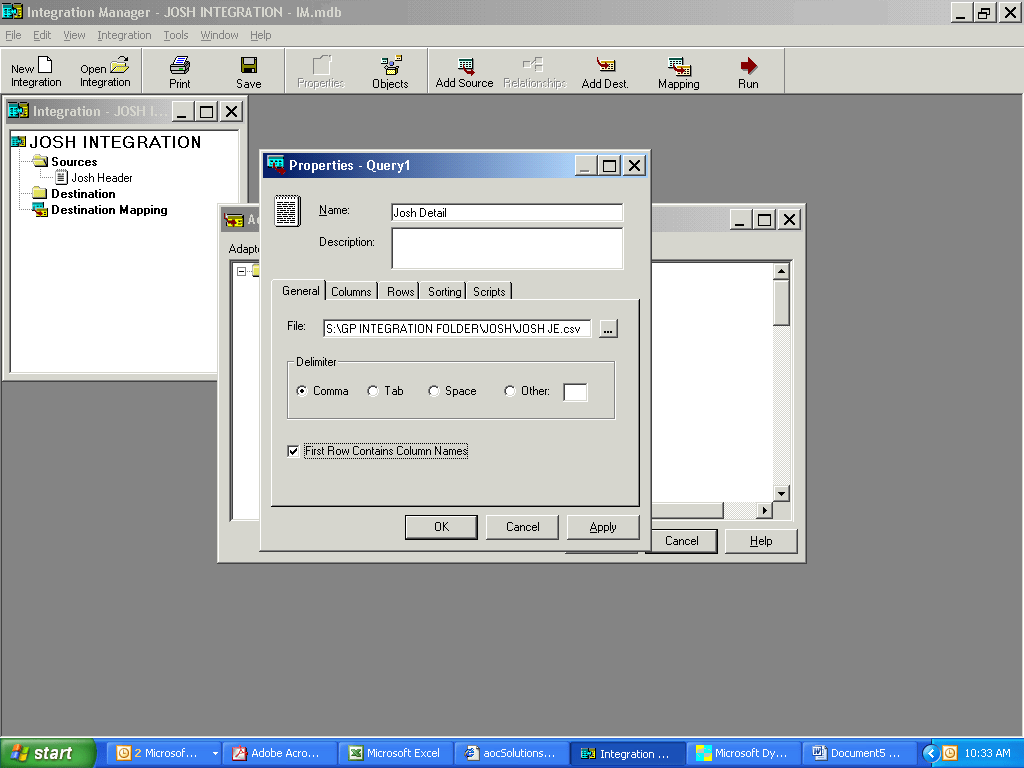
8. While in the General tab, name Header file (Josh detail) and point to .csv file. The delimiter is comma and you’ll mark First Row Contains Column Names again.
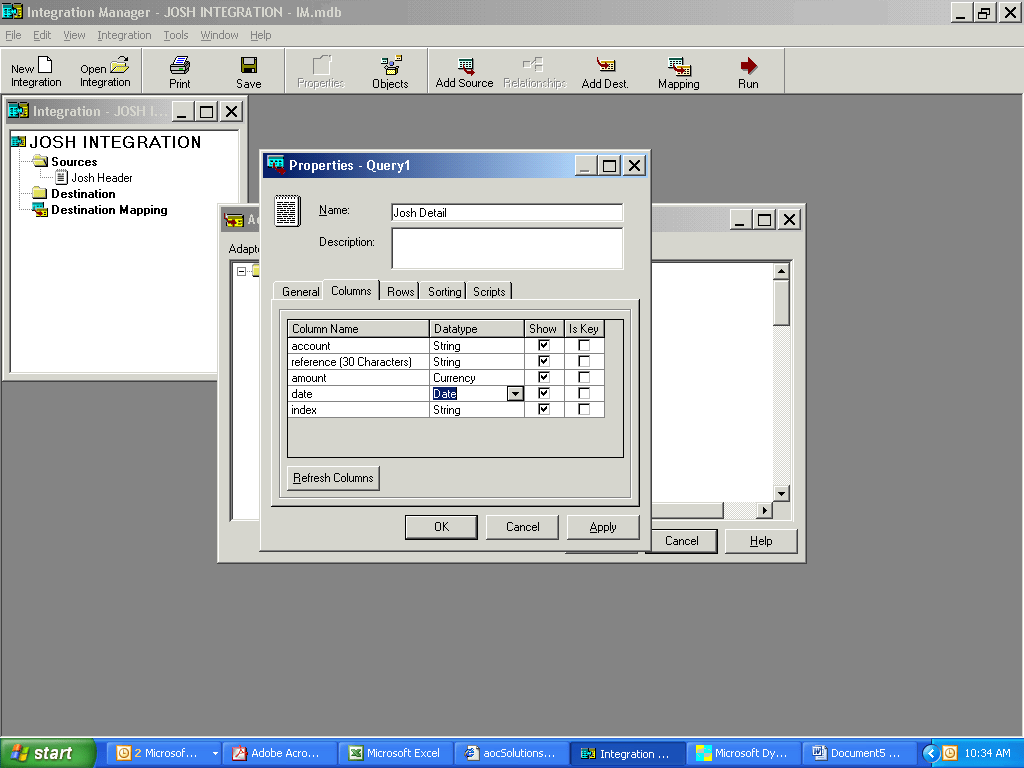
9. Change to Columns tab and change datatype on amount, date:
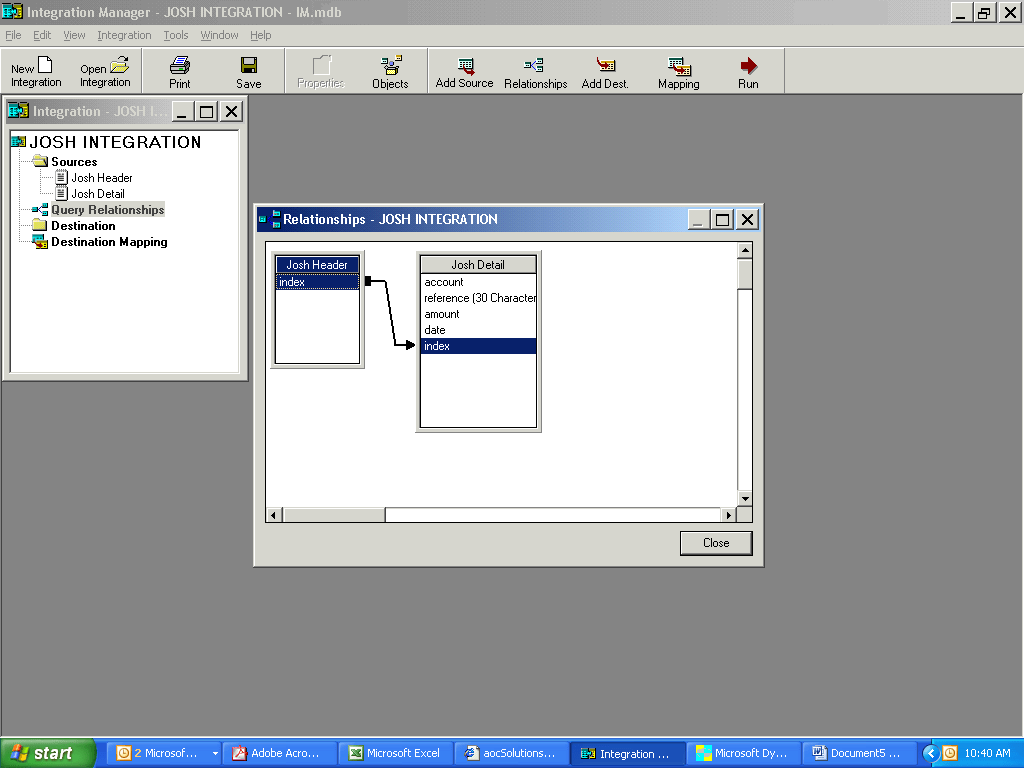
10. Change to the Rows tab and make the following selections: Column = Date,Operator = <>, Value = 0:
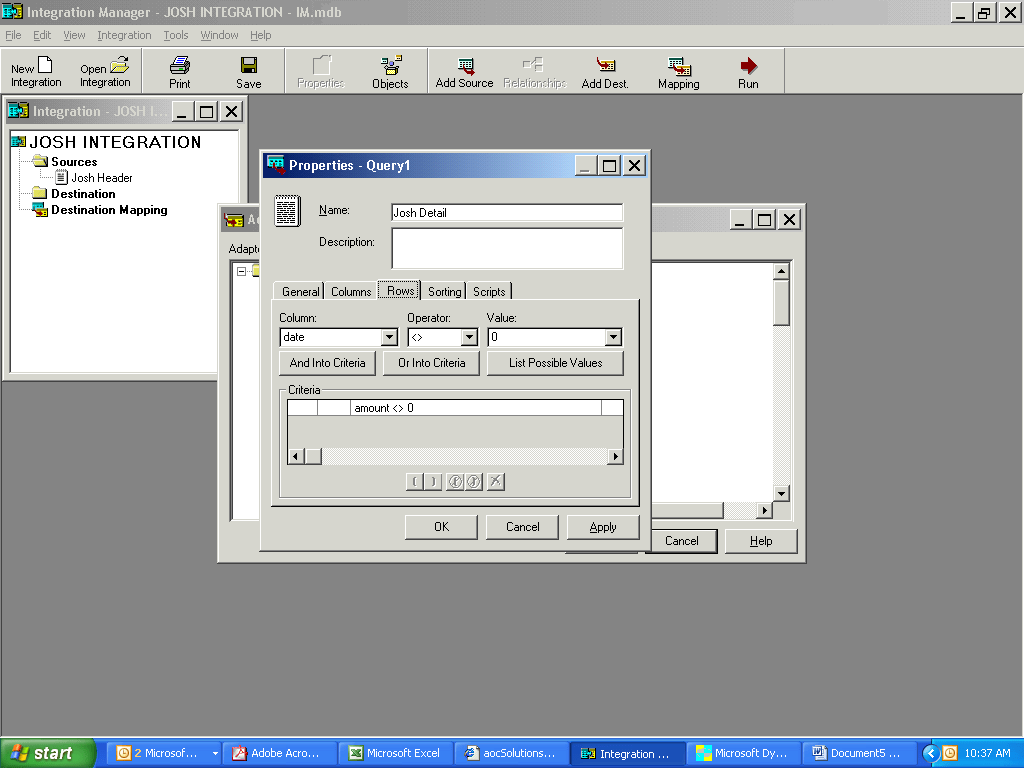
11. Choose the And Into Criteria button:
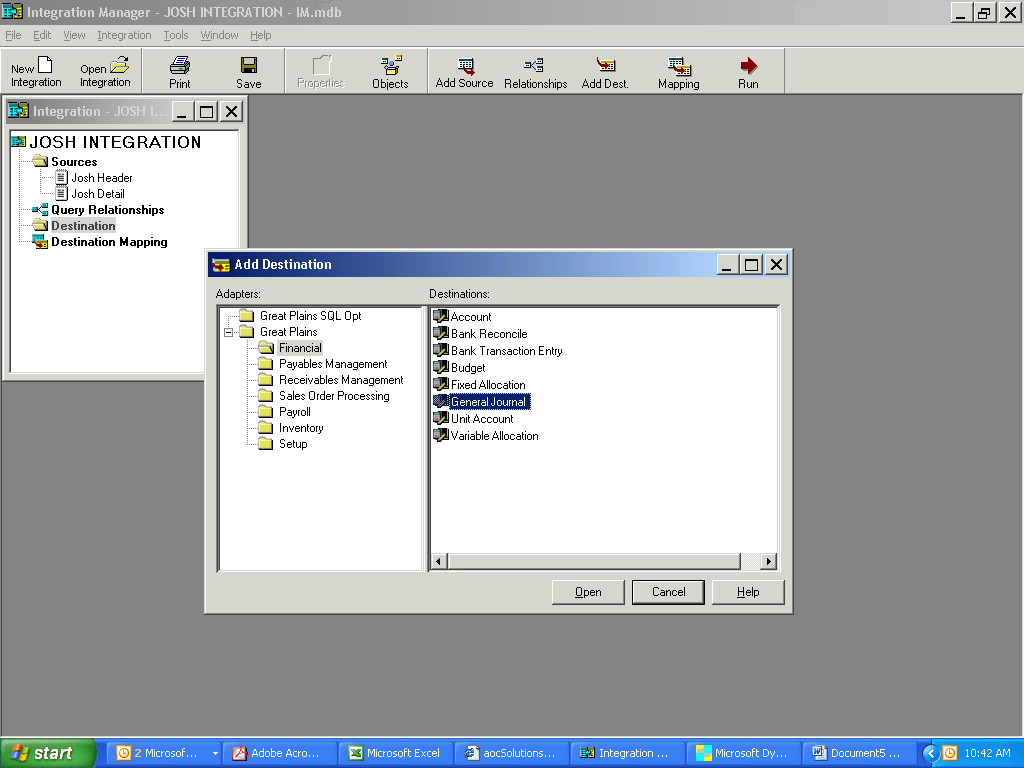
12. Click on Add Destination button. Expand Great Plains > Financial >General Journal:
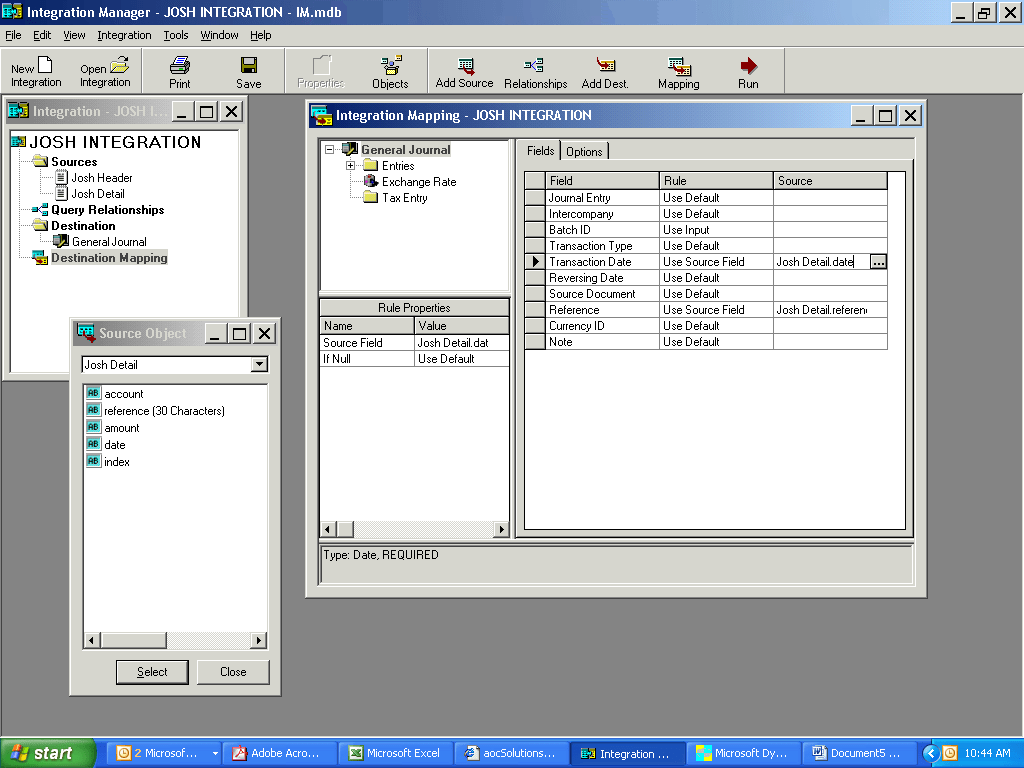
13. Choose Destination Mapping and select the following:
- Batch ID = Use Input (this will prompt the user to enter the batch ID when running the integration)
- Transaction Date = Use Source Field (Choose “…” in the source object and change the dropdown to XXXX Detail, then choose date)
- Reference = Use Source Field (Choose “…” in the source object and change the dropdown to XXXX Detail, then choose reference: 30 characters)
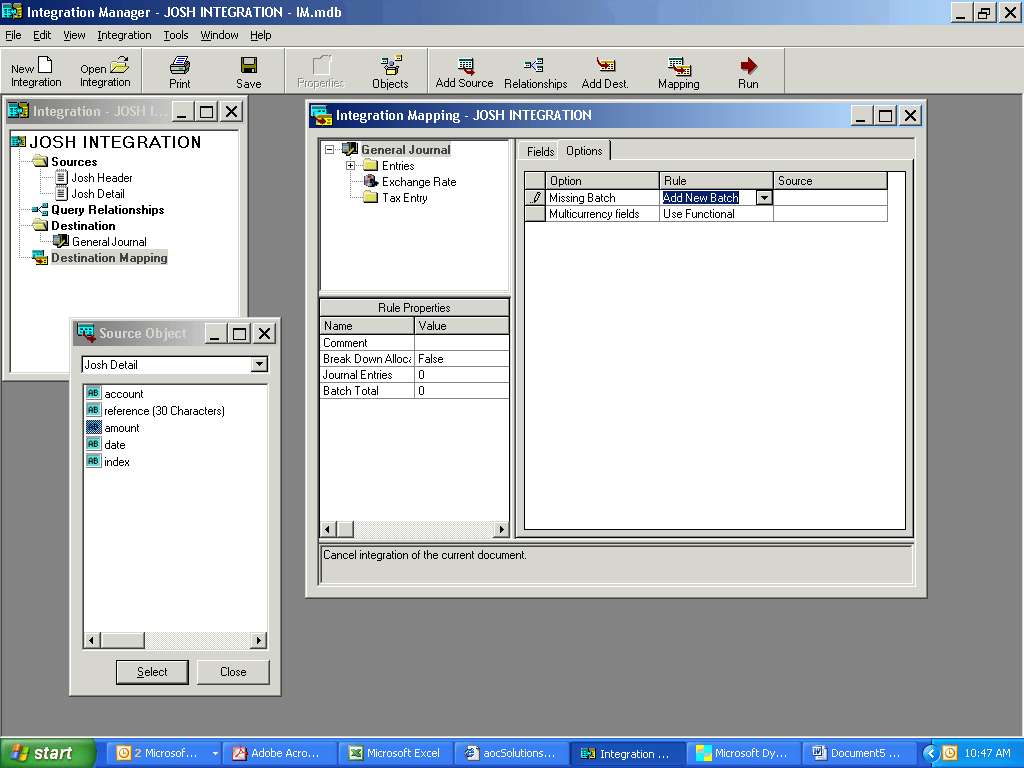
14. Switch to Options tab and select Missing Batch = Add New Batch:
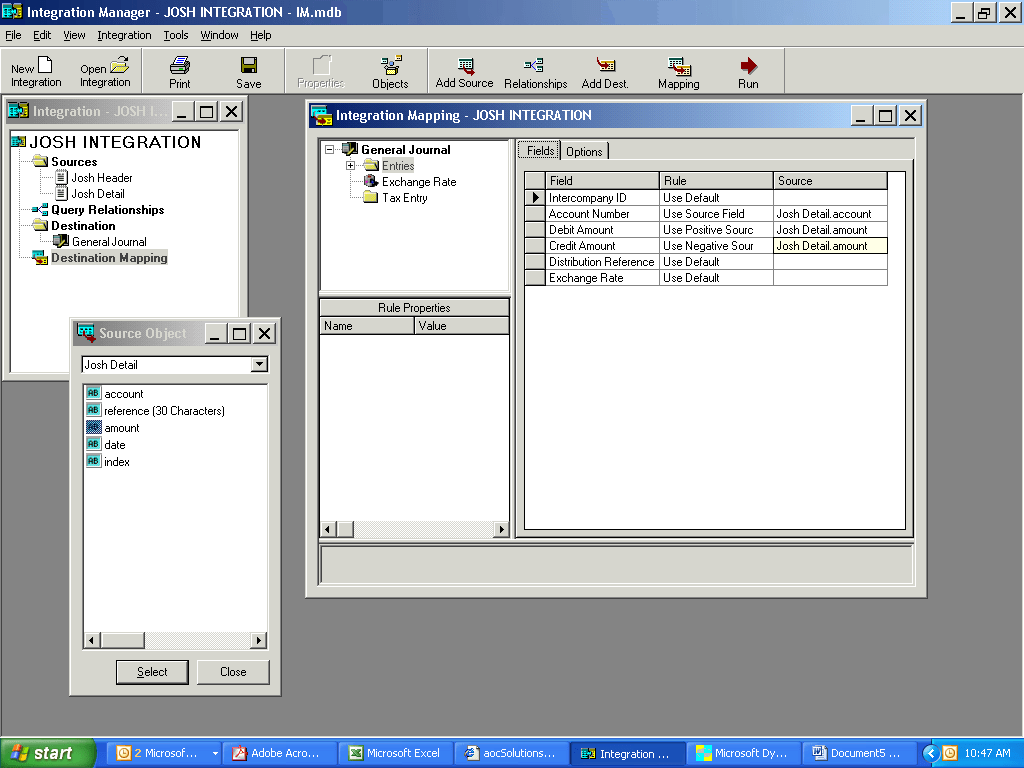
15. Change to Entries > Fields and select the following:
- Account Number = Use Source Field – source object = account*
- Debit Amount = Use Positive Source – source object = amount*
- Credit Amount = Use Negative Source – source object = amount*
*These column names may vary based on your source file
16. Save the integration.
17. Ensure that you’re logged into the correct GP company – we recommend you run into your Test database the first time.
18. Run.
Microsoft Dynamics GP
Microsoft Dynamics GP makes it easier to gain actionable insights and improve process efficiency. It’s customizable, flexible and designed to help you better manage your financials, distribution, human resources, manufacturing, inventory and operations.
